Saturday, December 18, 2010

Pizza Buns


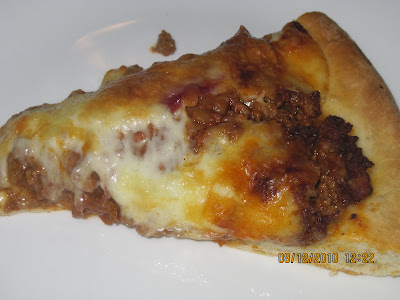
You’ve GOT to try these! They are the best recipe for pizza buns I’ve tried. They have it all, the sauce, the cheese, the meat AND the amazing doughy crust! WOW! Use the french bread recipe but do not let dough rise as french bread. Roll out your dough, put on your toppings, then roll back up. You have the option to let the pizzas rise or not. Enjoy!

French Bread Recipe

2 Tbsp. sugar
2 Tbsp. cooking oil
2 tsp. salt
2 cups hot tap water
4 1/2 - 5 cups flour
2 Tbsp. instant yeast


*Mix in order given, mixing the yeast with a little flour and adding that while dough is still very soft. Add enough flour to make a dough that holds together in a ball shape and is not sticky if you handle it with floured hands. Cover.

Let rise until double, about 1/2 hour. Divide in half.

Roll out to about 12x15” rectangle. Roll up jelly roll style and place on greased or parchment paper lined cookie sheet. Cut diagonal slits on top. Let rise about 30 - 45 min. Brush with mixture of 1 egg and 2 Tbsp. milk, beaten with fork.
Bake at 400F for 20 min, or until golden

When making pizza buns, only use the steps in the French bread recipe that have a * in front of the paragraph.

Pizza Buns

French Bread recipe (above)
pizza or spaghetti sauce
grated cheese (approx. 4 cups)
grated pizza meats, such as peperoni, ham, sausage

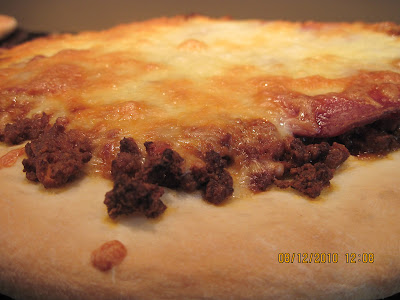
Roll out dough into a very wide and big triangle. Spread lightly with sauce. Cover with grated cheese, and meats.
Roll up jelly roll style. Cut into approximately 1 inch slices.
Place on greased cooking stone or cookie sheet.
If you would like to have doughy and thick buns, cover with tea towel and let rise for half an hour in warm spot like a warm oven, or for extra doughy, yet crispy buns, do not let rise and once prepared, fire them in the oven. Either way, bake at 375° about 15 min.

Sunday, December 12, 2010

Most Amazing Cheese Biscuits!


These biscuits are so good that I've made them three times this week! They are cheesy, soft, doughy, and even good cold. I've got the recipes down pat by memory!

Cheese Biscuits

2 cups flour
2 tsp. sugar
1/4 tsp. salt
2 tbsp. baking powder
1 cup of grated cheddar cheese


1/2 cup butter
2/3 cups of milk

Preheat oven to 450°.

Mix dry ingredients together with whisk including grated cheese. Put in softened butter and cut with pastry blender or 2 knifes. Add milk and stir together till forms something that resembles dough. If it is not in a dough ball (it shouldn't) knead together on floured surface. Should be firm yet soft to knead. Once it forms a decent ball, roll out the dough on a floured surface to about a little less than a centimeter. Get a cup with no handles that is a good size for a biscuit. Press circles using your cup into the dough to create the shape of the biscuit. Another style to shape your biscuits are to just peel away gobs of dough, knead them and then flatten and place on baking sheet or cooking stone. Either way, grease the stone or baking sheet before cooking. Cook for 10-12 minutes.


Thanks for reading!


Saturday, December 4, 2010

Anzac Biscuits


In school we had a culture fair, and I decided to bring traditional "biscuit" of , the country - Australia. "Anzac" represents Australia and New Zealand Army Corps and the cookies were often made during the war.

Anzac Biscuits

2 cups quick cooking oats
2 cups all-purpose flour
1 cup white sugar
1 cup brown sugar
1-1/2 cups flaked coconut


2 tablespoons golden syrup
1 cup butter


1/4 cup boiling water
2 teaspoons baking soda


Mix oats, flour, sugar and coconut together.
In a small saucepan over low heat, melt the syrup and butter together. Mix the baking soda and the boiling water and add to the melted butter and syrup.
Add butter mixture to the dry ingredients. Drop by teaspoons on greased cookie sheets (or baking paper).
Bake at 350 degrees F (175 degrees C) for 10-15 minutes

Adapted from allrecipes.com


Feel free to email me at my new email address -
shesinthekitchenagain@hotmail.ca

Saturday, November 27, 2010

Breakfast Bake


Breakfast  Bake


1/4 of a 1 kilogram bag of frozen hash brown potatoes


6 eggs
1/4 cups of milk


1 1/2 cups of grated summer sausage
1 1/2 cup cheddar cheese


In a medium mixing bowl, beat together eggs and milk.  Stir in frozen hash brown potatoes.  Pour into a greased 8"x8" or 9"x9" baking dish.  Fry the grated summer sausage until lightly browned and crispy.  Sprinkle the crispy sausage onto the potato, milk and egg mix followed by the cheese.  Bake at 350 degrees F for about 30 minutes or until a knife inserted into the center of the dish comes out clean.


Is it really this time of week to blog again? These weeks go too fast some times - weather I'm making supper or not. I made this recipe on a Saturday morning when dad was gone curling some where. We wanted some food to eat so I threw together what we had on hand. Some left over hash browns from the week past, 6 eggs left in the carton, summer sausage for Friday night pizza, and some cheese never hurt anyone - right lactose-intolerants?


Try it some time and email me about it!


Thank for reading!

Saturday, November 20, 2010

Best Big, Fat, Chewy Chocolate Chip Cookies


Best Big, Fat, Chewy Chocolate Chip Cookies

2 cups all-purpose flour
1/2 teaspoon baking soda
1/2 teaspoon salt
3/4 cup unsalted butter, melted
1 cup lightly packed brown sugar
1/2 cup white sugar
1 tablespoon vanilla extract
1 egg
1 egg yolk
2 cups semisweet chocolate chips

Preheat the oven to 325 degrees F (165 degrees C). Grease cookie sheets or line with parchment paper.
Blend together the flour, baking soda and salt; set aside.
In a medium bowl, cream together the warm melted butter, brown sugar and white sugar until well blended. Beat in the vanilla, egg, and egg yolk until light and creamy. Mix in the sifted ingredients until just blended. Stir in the chocolate chips. Chill for 20 minutes in the fridge or put in the freezer for quicker prosses. Drop cookie dough using a 1/4 cup at a time onto the prepared cookie sheets(parchment paper). Cookies should be about 3 inches apart.
Bake for about 20 minutes oven,and the edges should be  lightly browned. Cool on baking sheets for a few minutes before transferring to wire racks to cool completely.


These cookies taste best fresh! What cookie doesn't? When they have been in a container for a day they go chewy and are like the store bought cookies dad craves.

When I had the cookies for a snack they tasted best with a drink like milk to wash them down. Also, I read the reviews about this recipe on its web site, and all of them talked about not skipping that extra egg yolk and making sure to let them sit in the fridge for a while to chill and combine better before baking. 


Thanks for reading!


Saturday, November 13, 2010

White Cupcakes


White Cupcakes


3/4 c. shortening
1 1/2 c. sugar
1 1/2 tsp. vanilla

2 c. all-purpose flour
1 tbsp. baking powder
1 tsp. salt

1 c. milk
5 egg whites

In a mixing bowl, beat the shortening on medium speed in an electric mixer about 30 seconds or more. Add the sugar and vanilla and beat until fluffy. Combine flour, baking powder and salt together in separate bowl. Alternating between dry ingredients and milk, add to the sugar/shortening mix, and blend well.

In a electric mixing bowl, beat egg whites until stiff peaks form and you can slice through the egg. Fold into flour mixture. Prepare muffin pans or line with paper baking cups. Fill each cup half full. Bake at 375 degrees for 18 to 20 minutes or until done. Cool on a wire rack. Frost with desired frosting. Makes 30 cupcakes.


Adapted from White Cake Supreme Cupcakes at www.cooks.com


Today is the western semi final in CFL football. The Saskatchewan Roughriders are playing the BC Lions, and you guessed who I am cheering for. The SASKATCHEWAN ROUGHRIDERS!!! Who else to cheer for? Tomorrow we are watching the game with some friends, so I though why not bake something for the occasion, let alone blog about it. So I made some die hard Saskatchewan Roughrider cupcakes to enjoy. 


To make the cupcakes in the team colors, I divided the batter into two bowls - half in each bowl. In one of the bowls, I used some green food coloring and put in drops until I got the deep Saskatchewan Roughrider green. The more coloring - the stronger the color will be. There are also color pastes  that are like gel. You use them the same as drops, yet the pastes give a stronger color while keeping the batter at the desired consistency. 


Once you have the color of the batter to your preference, you can spoon in layers or sections of the batter alternating colors you would like to have in your cupcake. For less mess, take a large jar - I used a 1 quart sized jar - and put a medium to large plastic bag in it. Let the zip top hang over the edge and out of the jar. 


Take your batter and cautiously pour the batter into the bag/jar. Be careful not to over flow or spill because it is a pain to clean up and is messy to use. Zip up the top to stop the batter from leaking.  Cut one very small corner off the bottom of the bag. I cut just enough so that I have control of the bag yet is easy to come out when squeezing. Just like piping, you can pipe the batter in layers or come up with cool designs.  When you pipe a design on the top of the raw cupcake it will show up well on the top when baked.


Thanks for Reading!!!


Monday, November 8, 2010

Basic Cooking Instructions


In our community, we started a 4H club. I am in the food/cooking group. The other day, we had our first meeting and lesson. So, the lesson was about the basics of measuring food properly. 


When I was taking notes in the meeting, I though wouldn't this be a great blog- to do posts of  lessons I've learned from in 4H. 


Hope you enjoy.


The 2 kinds of measuring are solid/dry measuring and liquid measuring.

Measuring Flour – Before measuring, fluff up the flour with a spoon. Take your measuring cup and gently spoon in amount till over flowing. Then level with strait edge such as strait edge. Do not shake or tap the cup of flour because the tiny particles compact together and decrease the amount (not literally). If you do shake or tap after leveled do not be tempted to add more, therefor you added too much.  
When you need finer flour you sift it through a sifter.
Too much flour leads to a heavier out come than needed and desired. 


Measuring Brown Sugar – When you are reading/making a recipe, and it calls for brown sugar, and when it does not say “pack” or “pack lightly”, do not pack the sugar. If there are other recipes that say, “pack” or “pack lightly”, please do so.


Measuring Sugar – Because Sugar is so sweet, you do not need the full amount of sugar indicated in the recipe,so you can cut back the amount needed. Sugar particles (crystals), are a lot bigger than tiny flour particles so it does not compact like flour 


Liquid Measuring – When measuring liquids, place a measuring cup on a solid and level area. Take your container of “liquid” and get down to eye level so you know exactly where your line of “liquid” is. That line is called the meniscus (the surface tension). Pour gently in to the measuring cup. Once you have approximately poured the amount of “liquid” needed, look at the bottom of the meniscus (the flat part of the line). The line needs to exactly on the measuring line.


Thanks for reading!


Saturday, November 6, 2010

Cheese Manicotti


Calling all cheese lovers!!! Cheese Manicotti is on the menu today. This is a very quick one that uses what you have on hand. A very tasty dish with no left overs!

Cheese Manicotti

2 2/3 cup mozzarella cheese
2 cup Monterey jack cheese
1 1/3 cup marble cheese

750 ml tomato sauce
1 cup salsa

14 manicotti noodles

Grate cheese and mix together. Grease 2 casserole dishes. Mix salsa and tomato sauce in bowl. Pour in sauce – half in each casserole dish. Boil water and cook manicotti. Cook until soft but firm. Stuff with cheese until noodles are firm. Layer in sauce to fit. Cook for 20 minutes in oven at about 350°.


If you have any thing to say about my recipes or my blog, leave a thought, become a follower, or email me at jensencooks@hotmail.com


Saturday, October 30, 2010

Caramel Apples

Hello again! Lets try a kind of dessert. Today we had a community pot luck. This one was a Halloween celebration so we brought a traditional treat - caramel apples.


Caramel Apples


very fine sandpaper
skewer sticks


2 cups brown sugar
1 cup golden corn syrup
1/2 cup butter


1/2 water
1 cup white sugar
3 tablespoons unsalted butter (or regular butter)
1 cup of powdered milk


about 24 small - medium sized apples


crushed nuts, candy or melted chocolate


Wash apples with hot water to get any wax off and dry the with a tea towel. Use sandpaper to scuff up the apple skins so the caramel will stick to the apple. Stick skewer sticks in the stem end of the apple and set on 2 cookie sheets covered with parchment paper. 


Combine the brown sugar, corn syrup and butter in a medium saucepan at low heat.


In a pot combine water, white sugar, and butter. Boil till a rolling boil, remove from heat and let cool slightly. This can be done by pouring the water mixture into separate bowl and placing it into the refrigerator for a quicker process. 


While warm, whisk the powdered milk into water, sugar, and butter mix. Whisk until no lumps remain and is a creamy color.
Bring brown sugar, corn syrup and butter mixture to rolling boil and add the other mixture in. As mixtures blends, it will look creamy. Continue stirring and bring mixture back to a rolling boil until it reaches the soft ball stage on a candy thermometer (234 degrees F or 116 degrees C). When you drop a bit from a spoon into a glass of water it will form a soft ball. 


Once it has reached that temperature, take your apple on a stick and dunk it into the caramel. You may have to spoon it on as well. This is when you would roll the apple on to crushed nuts. Set the dunked apples on the prepared cookie sheet and leave the stick and apple as strait up as possible. As soon as you put the apple on to the cookie sheet, is when you would put any other candies, such as crushed chocolate bars, and candy pieces. If you were to put a drizzle on, you would wait until cooled. 


Saturday, October 23, 2010

Our Style Steak

    
       All you need are the three main ingredients ; steak, salsa, and cheese.


    Our Style Steak


     4 medium steaks (we often use sirloin steaks)
     enough salsa to cover steaks
     any a mount of grated cheese (Cheddar, and Mozzarella)


     Preheat oven to 325°.


     Place meat cuts into casserole dish or into a  roaster. Cover with salsa. Then use a lid or use tin foil for cover to keep in moisture. Put in oven at 325°. Cook until done. When you are near serving time, take out of oven and sprinkle any amount cheese on top. Wrap in tin foil or put on the lid and throw it in the oven. Serve when meat is cooked and cheese is melted.


 I call this recipe our style steak because my family made up this one. My dad loves any thing spicy and strong in flavor - especially salsa. When we would be on the run, my mom would whip up this in no time. You could easily put this one in the slow cooker for more tender meat to cook it over a day instead an after noon.If you have any questions, comments or would like to say hello, please feel free to email me at jensencooks@hotmail.com or become a follower. I would love to have some questions to answer. Check out the poll as well.


     In these pictures we served this dish with fried zucchini disks and a baked potato. The baked potatoes can be cooked at the same time as the steaks. Before you sit down to eat you could fry up some fresh zucchini or other veggies to eat.

Sunday, September 26, 2010

Pizza


Yes, today I am talking about pizza. 


Pizza

Crust
2 cups of flour
1 ¼ tsp. instant yeast
¼ tsp. salt
¾ cup water
7 and a half tsp. olive oil
Pizza sauce or pasta sauce to cover thoroughly
Any topping – fresh pineapple, ham, pepperoni,
salami, fresh mushrooms, leftover chilli, and any cheese.

Preheat oven to 425° F.

Combine flour, yeast, and salt in a mixing bowl. Warm up water and oil to very warm but not hot. With machine running, slowly pour water and oil into flour mixture. Let the machine work for a couple of minutes. Knead dough on a lightly flour surface for a while until it is soft and elastic. With a rolling pin, roll out the dough on a lightly oiled pizza stone. Cover pizza with pizza/pasta sauce and toppings. 
  
Cook the pizza for about 17 minutes at 425°F. The more toppings there are on a pizza the longer the pizza takes to cook.


When we make pizza, it`s like the whole house gets excited. You can even hear it. You keep telling yourself - it's coming, it's coming. Once the aroma hits, you  think - That's it. I am going into that kitchen and coming out with a piece of pizza. And that is final. Until mother stops you in your tracks and says
"Go sit down or you'll choke." There is no arguing in that statement. Mothers are usually right. 

We love to use leftover chili on our pizza. Here are some pictures of it:


When we use chili, we don`t use tomato sauce on the pizza and usually only cheddar cheese because the flavor is stronger  and sharper. The chili can be just a regular dish of leftovers. I like the chili to be dryer than normal. If the chili is runny, you could add some flour to thicken it up when cooking. It does not matter if you put the chili on cold or hot when you are to put it in the oven. In our chili recipe we cook about 1 pound to 1 and 1/2 pounds of ground beef for the 4 of us. Then we add 1 or 2 cans of tomato soup.  Next I like to add onion powder, chili powder, 1 can of brown beans, and 1 can of kidney beans and my dad loves to add a lot of salsa and A LOT of chili powder. Here is a story about that... 


One time, my dad and the hired man were home alone to fend for themselves for lunch. My brother and I were in school and my mother was somewhere else. So my dad made chili that day. He added some ground beef, way too much hot chili powder, and ALOT of hot salsa and not enough beans. I heard it was so bad that after they "tried" to eat it they had to find something else to eat for lunch. They said the chili was brutal. 


Anyway...
After we eat chili, in the next couple of days one of us usually creates our chili pizza with the leftover chili. For the 4 of us, we usually double the dough recipe to make 2 pizzas, one with the leftover chili and the other with more traditional toppings. On the traditional pizza we add pizza sauce, or if we are out, we add some pasta sauce. It works and tastes all the same. On top of the sauce we may add some fresh fresh pineapple (right from the store (never canned)), ham, salami, pepperoni, fresh mushrooms, and/or red-green-orange-yellow pepper, and sometimes afterward when it is cooked we add fresh tomato slices. For cheeses I have added cheddar, mozzarella, Monterey Jack, Gouda, Feta, Parmesan, and sometimes goat cheese. Try experimenting with different combos of flavor!


I would like to encourage you to email me at jensencooks@hotmail.com. Ask me about my recipes, techniques or to just have a chat! I will try to return your email as soon as possible.


Friday, September 24, 2010

Chicken Pot Pie


Lets use up those left overs! Get enthusiastic about them and let the world know leftovers can taste good! It is about just adding spices or transforming it all.  In this case, we are changing it so much it's not even like leftovers. It is more like hiding the taste to make people eat leftovers without knowing it. To use up chicken or turkey, we use our chicken pot pie recipe. It has never failed us once through all those chickens and turkeys we've eaten over the years. Let's give it a go!

Chicken Pot Pie

1 cup chopped onions
2 tbsp. butter
2 cups water
2 chicken bouillon cubes
3 generous cups potato
2 cups cooked chicken
1 ½ cup carrots
1 cup peas
½ tsp. salt
1/8 tsp. pepper
2 tsp. poultry seasoning
1/3 cup flour
¾ cup milk
1 cup water (optional)

Cook onions in 2 tbsp. of butter until softened. Add 2 cups of water and 2 bouillon cubes. Add potatoes
(if using fresh vegetables add here) and then bring to boil with a lid to cover. Add chopped cooked chicken (if using frozen vegetables add here). Simmer until potatoes are soft. Stir in salt, pepper and poultry seasoning. Whisk together flour and milk. Stir as you add milk mixture. If the stew is too thick add water to thin. While the stew is simmering, prepare your pie crust.

Pastry for Double Crust Pie
(source: Better Homes and Gardens New Cook Book )
4 cups flour
1 tsp. salt
1 1/3 cup shortening or lard
12 tbsp. water

Mix together flour and salt. Use a pastry blender to cut in shortening or lard. Once the pieces are about pea size, pour in water tablespoon at a time and mix till in a sticky ball. You can use a machine mixer or by hand. Once you add in the water it is a very quick process to mix it all together.

Roll out about a hand full of dough to reach the size of about a saucer plate. Take a saucer plate and place it down and cut around it with knife or table knife. Take dough circle and place it in one of the tin pot pie plates. Scoop about 1 to 1 ½ cups of stew into chicken pot pie. Cut another circle the same size and place it on top as a cover. Crimp the edge with a fork by pressing into it to seal it. Poke the fork into the center of the covered pot pie to let air out when cooking, and to stop explosions. Repeat process until all dough is gone. Makes about 8 chicken pot pies. Set on cookie sheet to cook at 425° about 15 minutes or until golden brown.

Okay, it may seem like alot, but it goes fast. It is worth the effort for how good these "leftovers" taste. You can use this recipe with turkey too. It is nearly just the same except that it is a different kind of meat all together.

Here is a quick interesting fact about using flour. In the winter the air is dryer, so flour may also be dryer. When the flour is dryer, it will absorb more water so you might have to add a little more water than what the recipe calls for.  My mother says not to worry about this. And like I said - mothers are usually right.

Yes, I did say that leftover taste good. As a matter of fact, I've had cooking that tasted better on the second day or third day of serving it! You probably have too.

When ever you are serving leftovers, be proud of it! It's not every day that you get to eat that same great meal twice or three times in a row! If you are hiding the "leftovers" in the meal, don't say any thing and see if the people you are serving it too say anything. If they haven't said any thing, you have truly perfected the art of serving ( or hiding ) "leftovers". Good luck!!!

Sunday, September 5, 2010

Roast Chicken


 Roast Chicken

1 chicken thawed 
(fresh, free run, farm chickens are best)
2 tbsp. olive oil
Sprinkle sage
Sprinkle cumin
Pinch nutmeg
Pinch mild curry powder
Sprinkle onion powder
Sprinkle poultry seasoning

Preheat oven to 425°.

Unwrap chicken from plastic. Rinse the chicken under water – inside and out. Take roasting pot and put 2 tbsp. of olive oil in and spread around equally. Spread seasoning on the chicken. Put in oven at 425° for 15 minutes then turn down oven to 325° and cook until golden brown.    


The fresher the chicken - the better turn out you will have. There is lots more flavor and a different taste in all. Finding the freshest chicken is always the hardest part. You can buy local chickens at a farmers market or food stores. My family sells our garden vegetables and our chickens at the farmers market in Lloydminster.

My family just got our chickens processed at the plant in St. Paul. We don't do it ourselves because it is a lot of work, and it is very disgusting. 


On to the chicken...


Okay - to bake a chicken it not that hard, whether its for Christmas dinner or Sunday night meal. Its just that it can take up alot of time to cook but other wise it's just getting every thing else ready like the potatoes, the vegetables, and the bread dish, whether its buns stuffing or both. My auntie would say "Thats exactly it,  Jensen." I also have no good pictures of the bird itself because dad cut into it before I even had the camera on me. So I took a picture of my brothers plate.


Do not be afraid to cook a big chicken. There's always ways to cook up the left overs some how. I've also read that you can put a whole lemon in the chicken. I like getting a few guide line recipes, then taking it from there. Adding a little bit from each, then my own touch here and there. With this recipe, I took the chicken and rinsed it off in the sink inside and out. Next I just set the bird into the greased roasting pan and sprinkled the seasonings on the chicken, trying to get every where. I  try to set the chicken into the center of the pan but it slipped around and ended up somewhere else in that pan. It doesn't show on the bird where it gets placed so long as it is about in the middle of the oven for the heat. Do not put vegetables in the roasting pan when you cook it. I don't know why, my mother told me to not, mothers are usually right. Keep the lid on the roasting pan so the bird does not dry out. I cooked the chicken until golden brown or until the meat is no longer pink and the drumsticks move easily in their sockets. I always forget to put I on the timer.


So there you have it. You can't wreck meal that badly. If you mess up in preparation, I would say call your mother, or search it on the internet, thats what I do. If you have any questions or anything like that leave them in the comments please.  


P.S.
My next blog will be about how use up your left over chicken!!!


Monday, August 23, 2010

Saucy Chicken and Amazing Rice


Lets try chicken today, shall we? One of my favorite dishes is just chicken, rice, and peas. Why not have it out buy adding its own tomato soup base sweet and sour sauce with enough nutmeg for flavor. I added the vegetable in with the rice so I don't have to cook a different dish and to add color. 


Saucy Chicken

1/4 cup butter
6 -8 chicken breasts or 6 lbs. of chicken parts

Sauce
1 cup water
20 oz. fl. (2 cans) tomato soup
1/2 cup white vinegar
1 cup brown sugar - lightly packed
1/2 tsp. nutmeg
1/2 tsp. ground cloves
1 cup onion finely chopped

Put butter in frying pan to melt. Set the chicken in side by side let them brown then let the chicken cook all the way through. 

Pour water into pot to simmer. Add soup. Stir and let bubble. Add the rest of the ingredients. Let simmer.

Pour some of the soup mixture into 2.5 liter casserole dish that is 2 inches deep. Once chicken is cooked place in dish and pour the rest of the liquid in the dish.

Cook until ready to eat and is bubbling at 375°F. Serves 6 – 8 people.


Amazing Fried  Rice

2 cups rice
4 cups water
2 vegetable bouillon cube
1 chicken bouillon cube
1 cup peas and carrots
Half of a medium onion finely cut.

Put water and rice into wok or frying pan. Heat until boiling, then let the rice cook and boil dry. Add all the other ingredients. Stir keep on low heat. Rice will be fluffy and sticky. When the bouillon cubes are gone and the vegetables are soft and cooked the dish is done cooking. Serves 5- 7 people and makes 5 – 6 cups.


With these dishes there will never be any leftovers - only clean plates. To half the saucy chicken for 4 - 5 people you half the recipe like normal. The amazing rice is always a top seller at our table so I like to make extra. You can also half this recipe by using 1 cup rice to 2 cups water. Instead of using 3 bouillon cubes try using 1 chicken bouillon cube and 1 vegetable bouillon cube. One small onion or 1/2 cup and 1 cup vegetables works well for the same color and nutrients. Whether the rice has been halved or not it has a really nice over all taste and texture. The saucy chicken is a quick dish that you can let sit and cook while you prepare the sauce and the rice to let it finish all in one. 


My next post will be about how we got our farm chickens processed up at the kill floor in St. Paul. Even though I just saw those chickens live this morning, I love the big full out meal with the main attraction - the chicken.With all the side dishes as in the gravy, biscuits or buns and the veggie dish.